You added two keyframes. Your title moves. Technically, animation has occurred.
Emotionally? It looks like a PowerPoint slide has clocked in for its shift.
If that sounds familiar, welcome. Today we’re making smooth keyframe animations in Premiere Pro with ZFlow: better entrances, calmer zooms, and motion that doesn’t stop like it just spotted a speed camera.
Reaction hidden. Select Play GIF to show it.
“One last tweak.” — an editor, three snacks ago.
Set two keyframes → park between them → open ZFlow → choose a curve → check the targeted property → Apply → watch the result at normal speed.
What you need: Premiere Pro 25.6 or later, ZFlow installed, and a short practice sequence. ZFlow is a paid plugin from ZeeKay Editz; this is a tutorial for our own tool. See current pricing and compatibility.
Why your animation moves like an NPC
Two keyframes set the values at two moments. Interpolation determines what happens between them. With linear timing, the value changes at a constant rate. That can be useful—but an instant start and stop can make an otherwise nice title feel mechanical.
Easing shapes the rate of change. It can soften a landing, delay an acceleration, or make a movement feel more deliberate. Premiere already has interpolation controls; ZFlow adds a repeatable curve workflow inside the app. Adobe’s interpolation guide explains the native options.
Think of carrying a full cup of tea. You don’t instantly go from standing still to sprinting, then stop against the kitchen wall. Your animation would also appreciate this basic courtesy.
A curve can improve timing. It cannot make a two-frame journey across the entire screen feel like a peaceful nature documentary.
First, give ZFlow something to work with
- Install the supported build. Follow the ZFlow setup guide. The current Marketplace version supports Premiere Pro 25.6+ on Windows and macOS.
- Select the clip you want to animate. For your first attempt, use a simple title graphic and animate its clip-level Position in Effect Controls.
- Create two different values. Put one Position keyframe at the entrance start and another at the resting position. Keep them comfortably apart while practicing.
- Park the playhead between those keyframes. Open Window → UXP Plugins → ZFlow. Check the property and span it reports.
A keyframe pair with identical values is a very elegant way to animate absolutely nothing. Check your start and end values before questioning the laws of motion.
Recipe 1: a title entrance with an actual landing
Let’s make a title slide into place, arrive quickly, then settle. Something with confidence. Something that pays rent.
- Build the start. At the first keyframe, position your title just below its intended resting place. For practice, try a modest travel distance rather than starting in another postcode.
- Build the end. Put the second keyframe at the final position. Around 12–18 frames is a starting experiment at 30 fps, not a mandatory setting.
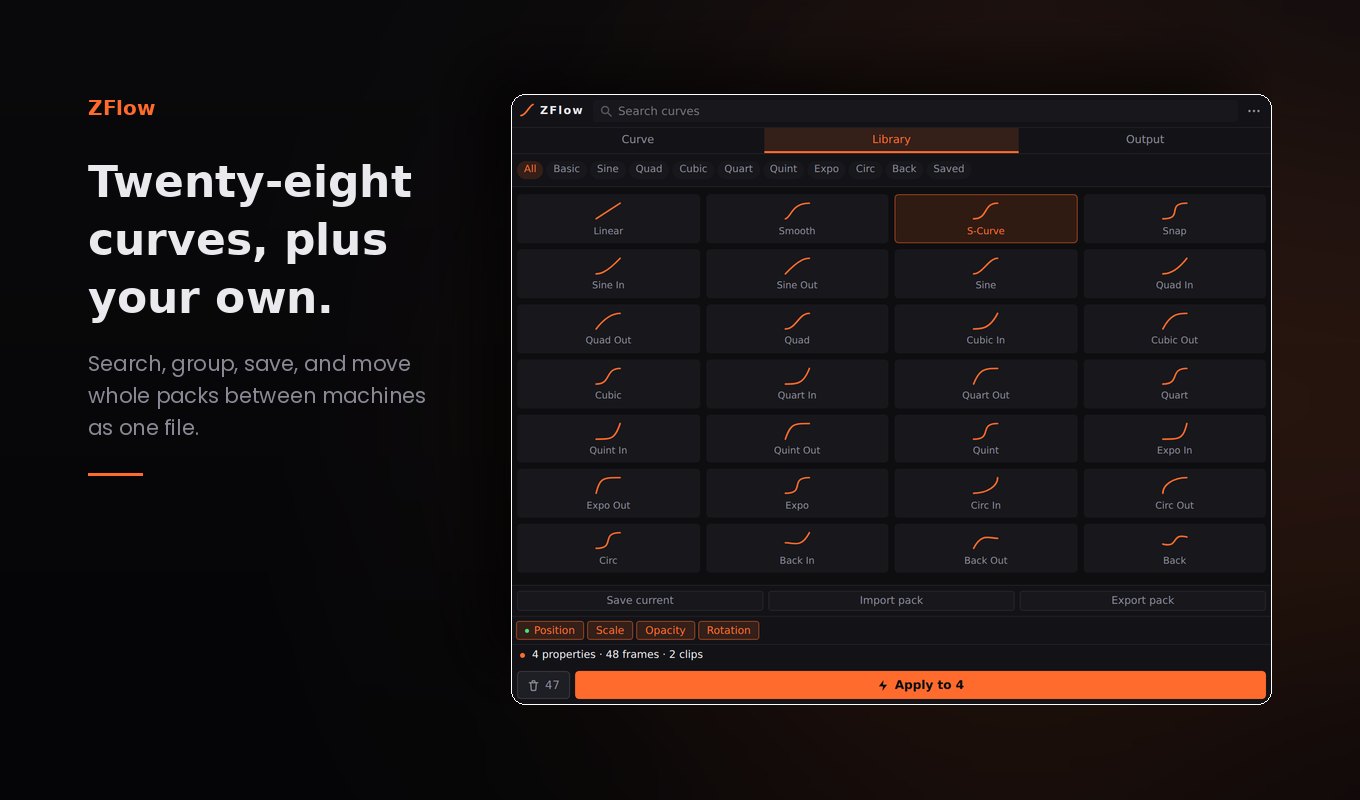
- Choose Cubic Out in ZFlow’s Library. The shipped library includes that preset; its fast start and gentler finish suit this exercise.
- Review the target, then Apply. Play the entrance in context, including the moment just before it begins and just after it stops.
- Change one thing at a time. Compare a shorter duration, a smaller distance, or a different curve. Keep the version that reads clearly.
If the arrival still feels abrupt, look at its final few frames. If the whole entrance feels sluggish, shortening it might help more than making the curve dramatic. Smooth does not mean slow; smooth means the timing feels intentional.
Reaction hidden. Select Play GIF to show it.
The plot twist was the timing between the keyframes. Not another glow layer.
Recipe 2: the “please stop jump-scaring the viewer” zoom
For a calmer shot, animate Scale across a longer span. Try 100% to 106% over roughly two seconds as a practice setup. These numbers are a recipe to experiment with, not a secret algorithm discovered beneath Adobe headquarters.
Park between the Scale keyframes, check that ZFlow is targeting Scale, and try Sine or S-Curve. Apply and compare. Keep an eye on the image edges and on whether the crop improves the composition.
If the original framing already cuts off someone’s forehead, scaling up is unlikely to return it. We’re shaping motion, not negotiating a hostage release.
Use a subtle zoom to support emphasis. If every sentence gets a huge punch-in, the viewer spends the entire video being approached aggressively by your camera.
Read the curve without getting a mathematics degree
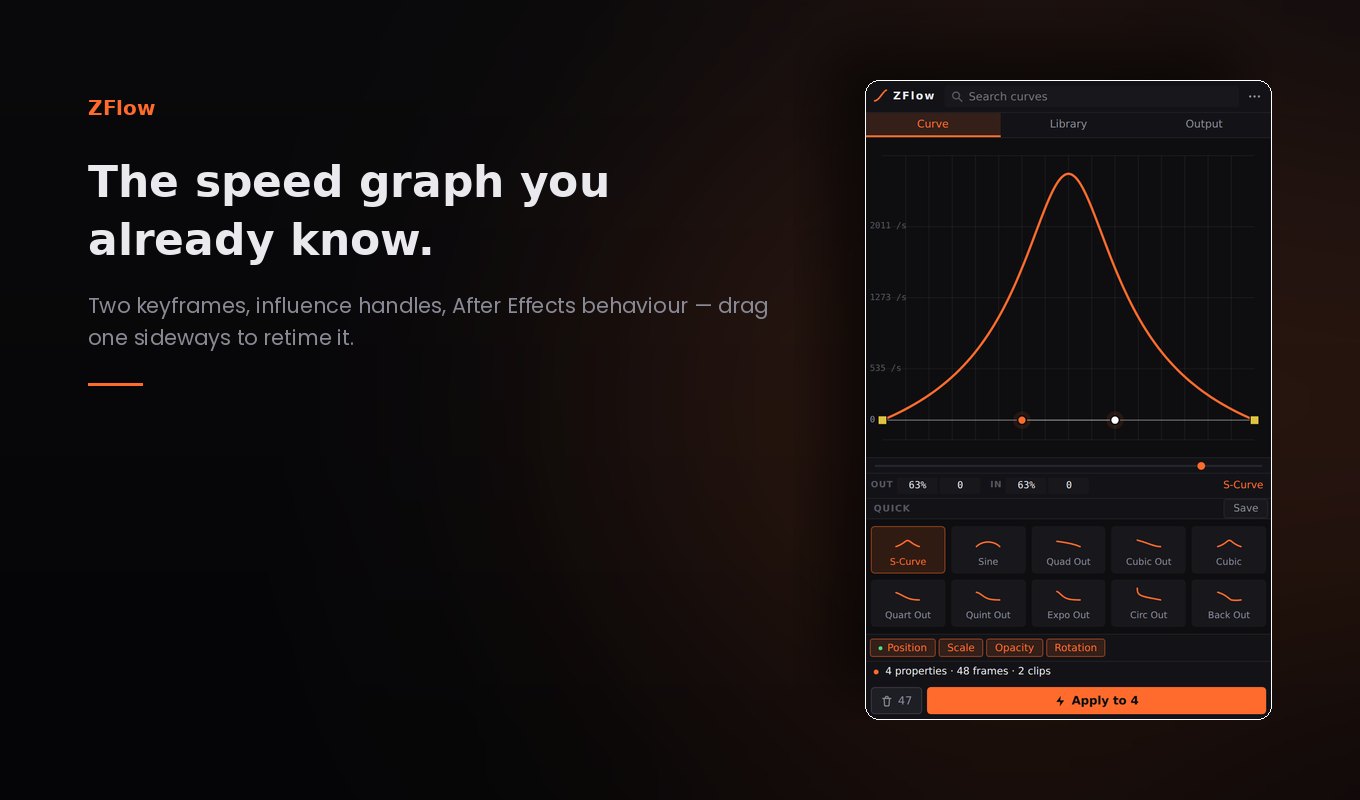
The curve editor lets you shape the movement; the speed-graph view helps you inspect how the motion develops. ZFlow also has a value-graph view in Settings → Graph → Value, documented in its support guide.
Keep the distinction clear: a value graph shows the changing value over time; a speed graph shows its rate of change. Do not read their slopes as if they were the same graph wearing different clothes.
Start from a preset you like. Make a small handle adjustment. Preview. If it becomes worse, undo or return to the preset. You are allowed to leave a good curve alone. This is difficult advice for editors, but I believe in us.
Recipe 3: let your elements enter like people, not a police raid
Imagine three separate clips: a heading, a subtitle, and a small icon. If they all arrive on the exact same frame, the result can feel like a single slab of information. A little stagger gives the viewer an order to follow.
- Give each clip the keyframe pair it needs.
- Select the clips intentionally. Check the targets ZFlow reports before applying a batch.
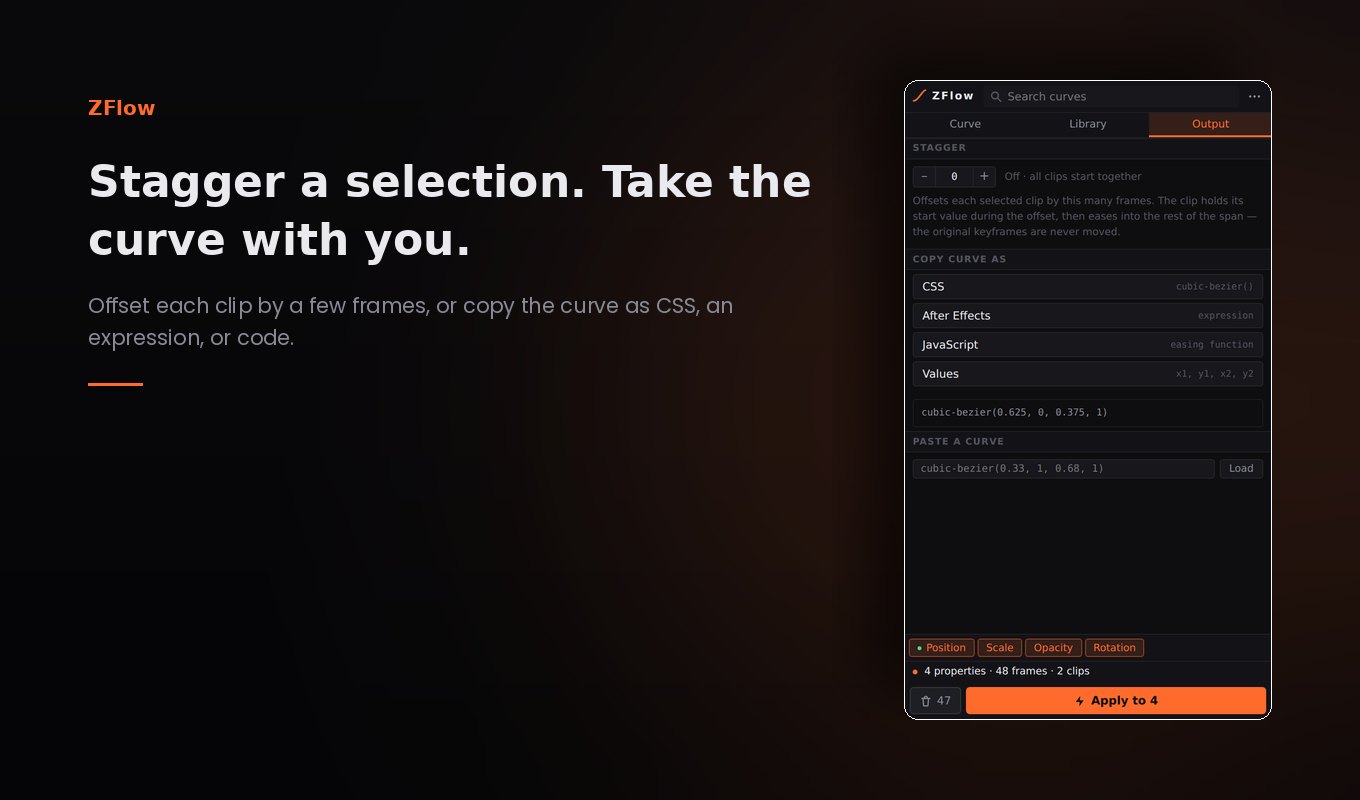
- Use the Output controls to stagger the selection. Try a small offset—around two or three frames—as an experiment.
- Watch the full group and check that the final timing still fits your edit.
At 30 fps, three frames are 0.1 seconds. That can be enough separation to make a group read differently. At another frame rate, the same frame offset means a different duration.
Keep the stagger short enough that the subtitle arrives while the sentence is still relevant. An elegant cascade should not resemble a group project where everyone submits on a different day.
Reaction hidden. Select Play GIF to show it.
Client: “Can we make it pop?” Me: it now has an entrance, a personality, and a mortgage.
Troubleshooting: the keyframes have entered their villain era
“Apply did nothing.”
Check the selected clip, the property ZFlow reports, the two endpoint values, and the playhead position. The support guide notes that a property chip can be unavailable when the playhead is outside its span or its keyframes are fewer than two frames apart. Read the chip’s tooltip before repeatedly clicking Apply like it owes you money.
“Now there are loads of keyframes.”
ZFlow writes the eased span frame by frame. That is expected. Its re-ease workflow lets you choose another curve without building up repeated layers of generated keys. Clear returns a ZFlow-managed span to its original parent keyframes. Keep a duplicate practice clip when you are learning.
“The movement bends when I only wanted a straight slide.”
Timing and path are different controls. Temporal interpolation concerns how a value changes over time; spatial interpolation concerns the motion path for spatial properties. Check Position’s path and spatial settings rather than assuming every unexpected detour comes from easing. Adobe’s Bezier guide explains the distinction.
“It’s smooth, but it still looks wrong.”
Check composition and context. Does the move draw attention to the right thing? Does it start before the viewer needs to read? Is it fighting the next cut? A beautifully eased bad idea remains a bad idea, now with excellent manners.
Your ten-minute practice mission
Make one title entrance and save three versions: your original timing, Cubic Out, and a gentler curve. Keep the distance and duration the same for a fair comparison. Then shorten your favorite version slightly and watch again.
Pick the one that feels right in the sequence—not the one whose graph looks most like an expensive roller coaster. Export a short test and check playback outside Premiere before calling it finished.
Quick answers before you open another 37 tabs
Can I ease keyframes without ZFlow?
Yes. Premiere has native interpolation and Bezier controls. ZFlow is an optional way to shape, save, and reuse curves, with batch and stagger tools.
Do I need After Effects?
No. The workflows in this article stay inside Premiere Pro. A bigger compositing job may still be better suited to After Effects.
What does ZFlow cost?
The current product page lists $19.99 as a one-time purchase. Check the ZFlow page for the latest price, requirements, and Marketplace link.
Will one preset make every animation look professional?
No. Pick timing that fits the shot. Your motion needs direction, hierarchy, and restraint—not a universal “make it expensive” button.
LESS KEYFRAME WRESTLING. MORE ACTUAL EDITING.
Give your next title a decent entrance.
Explore ZFlow’s real panel, try the interactive curve demo, and see the setup guide before you buy.
Next up: put that title behind your subject with Object Masking, or go deeper with our Premiere animation timing guide.
Panel images are the product screenshots published on the ZFlow page. Numerical recipes are suggested practice settings, not measured guarantees. GIF reactions are credited to GIPHY and do not demonstrate plugin behavior. Adobe and Premiere Pro are trademarks of Adobe; this is an independent ZeeKay Editz tutorial.